
The first thing you'll want to do in Swift Galleries is add a product to sell to your clients. We call these "Products" in Swift Galleries.
There are three ways you can create a new Product and they're very simple - you can load products from inside the Swift Galleries app, you can build and import your own CSV, or you can create a Product manually.
Create a New Product by Loading a Product from Swift Galleries (the fastest option!):
- Head over to the Manage Products screen
- Click the red "Add Product" button
- Click the "Load from Swift Galleries" button
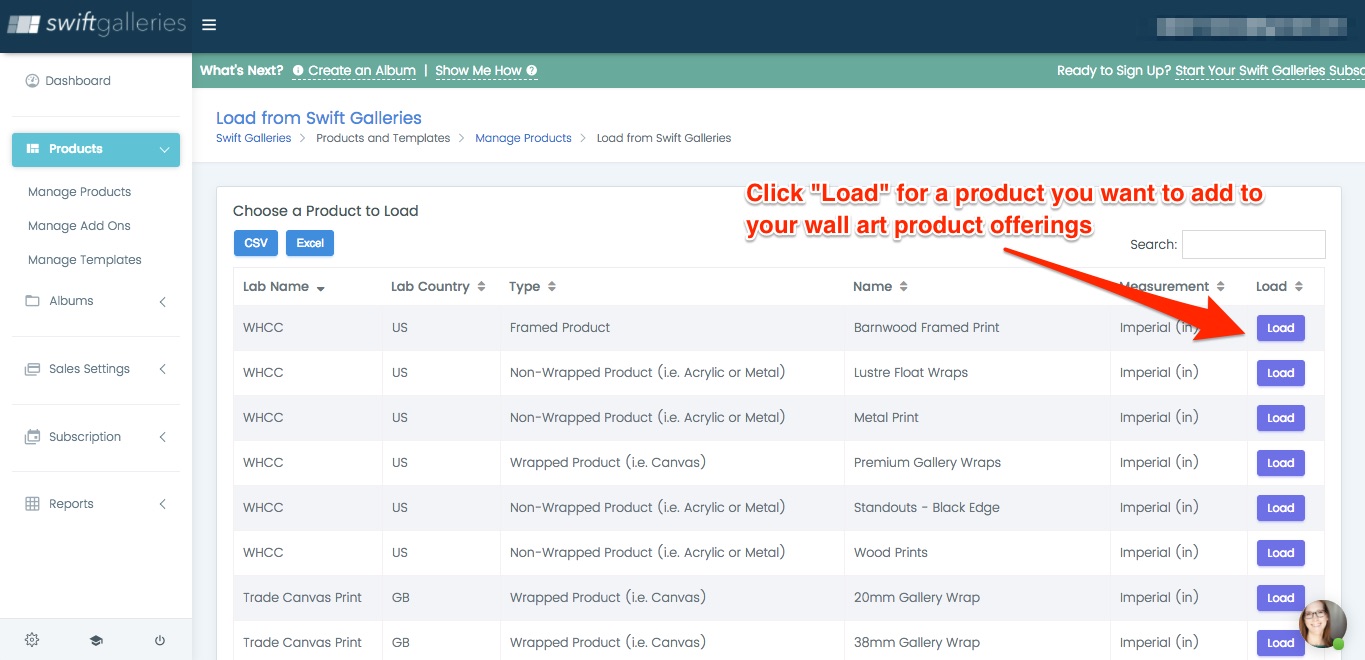
- Choose a product or search for a product, and click the "Load" button
- Confirm the information is correct, then finish the load - be sure to choose a product color otherwise we use a medium gray
- Tweak your prices (if you want. They're set to 4X the product cost by default)
- And that's it! You're ready to sell that product with Swift Galleries!
Create a New Product by Uploading a CSV:
- Use this link to download a copy of our CSV template. Make sure you follow the directions on not changing column titles, etc. and use the correct product type CSV (wrapped, for example).
- Once you've made changes to the product info as needed, save this as a CSV.
- Head over to Manage Products.
- Click Add Product.
- Click Import from CSV then Import Product.
- Click Choose File then choose the CSV you just created and import it. Double check all your product's info.
- Choose a product color. This color is represented in templates by the product itself being this color - so if you choose light blue, all the rectangles/squares/circles for this product will be light blue.
- Click Finish Importing My Product. Done.
Create a New Product Manually:
Prefer to read? Go nuts:
- Head over to the Manage Products screen
- Choose whether your product is a Wrapped Product (like a Canvas, where the image could wrap around the edges), a Non-Wrapped Product (like a Metal Print) or a Framed Product (like... you know... a framed print)
- Choose a measurement system - Imperial (inches) or Metric (centimeters)
- Name your new product. This will be seen by your client, so you'll probably want to leave the lab name out.
- Enter the Lab name you'll order this product from (this will not be seen by your client, it's only used for your reports and order info)
- Define the edge wrap or bleed for the product.
- Give your product a description. This can also be seen by clients, so this is another one you might want to leave the lab name out of.
- Choose a color that will represent this product in Swift Galleries - you will see the color when you're viewing templates as well as when you're choosing a product to add to the wall
- Click "Save Product"
Swift Galleries will create up to 10 sizes and 10 templates (or 5 templates for framed products) for you by default. We base this number of templates on our most popular sizes. If your product doesn't have these popular sizes, you will see less templates.
We'll drop you right in on that new product, where you should:
- Verify your lab offers all of the sizes we created for you
- Add any other sizes your lab offers that we didn't create for you (just click the "Add Product" button)
- Enter your labs' costs into the Cost column
- Enter your retail price (what you'll charge your clients) into the Price column
- Save your changes!
As you can see, we've done a lot of the work for you with the importable CSV files, so that's a more straightforward way to quickly create a new Product Type. If, however, you'd like to create your own (or we don't have a CSV file for the product you'd like to offer), creating a product manually is very simple, as well!