
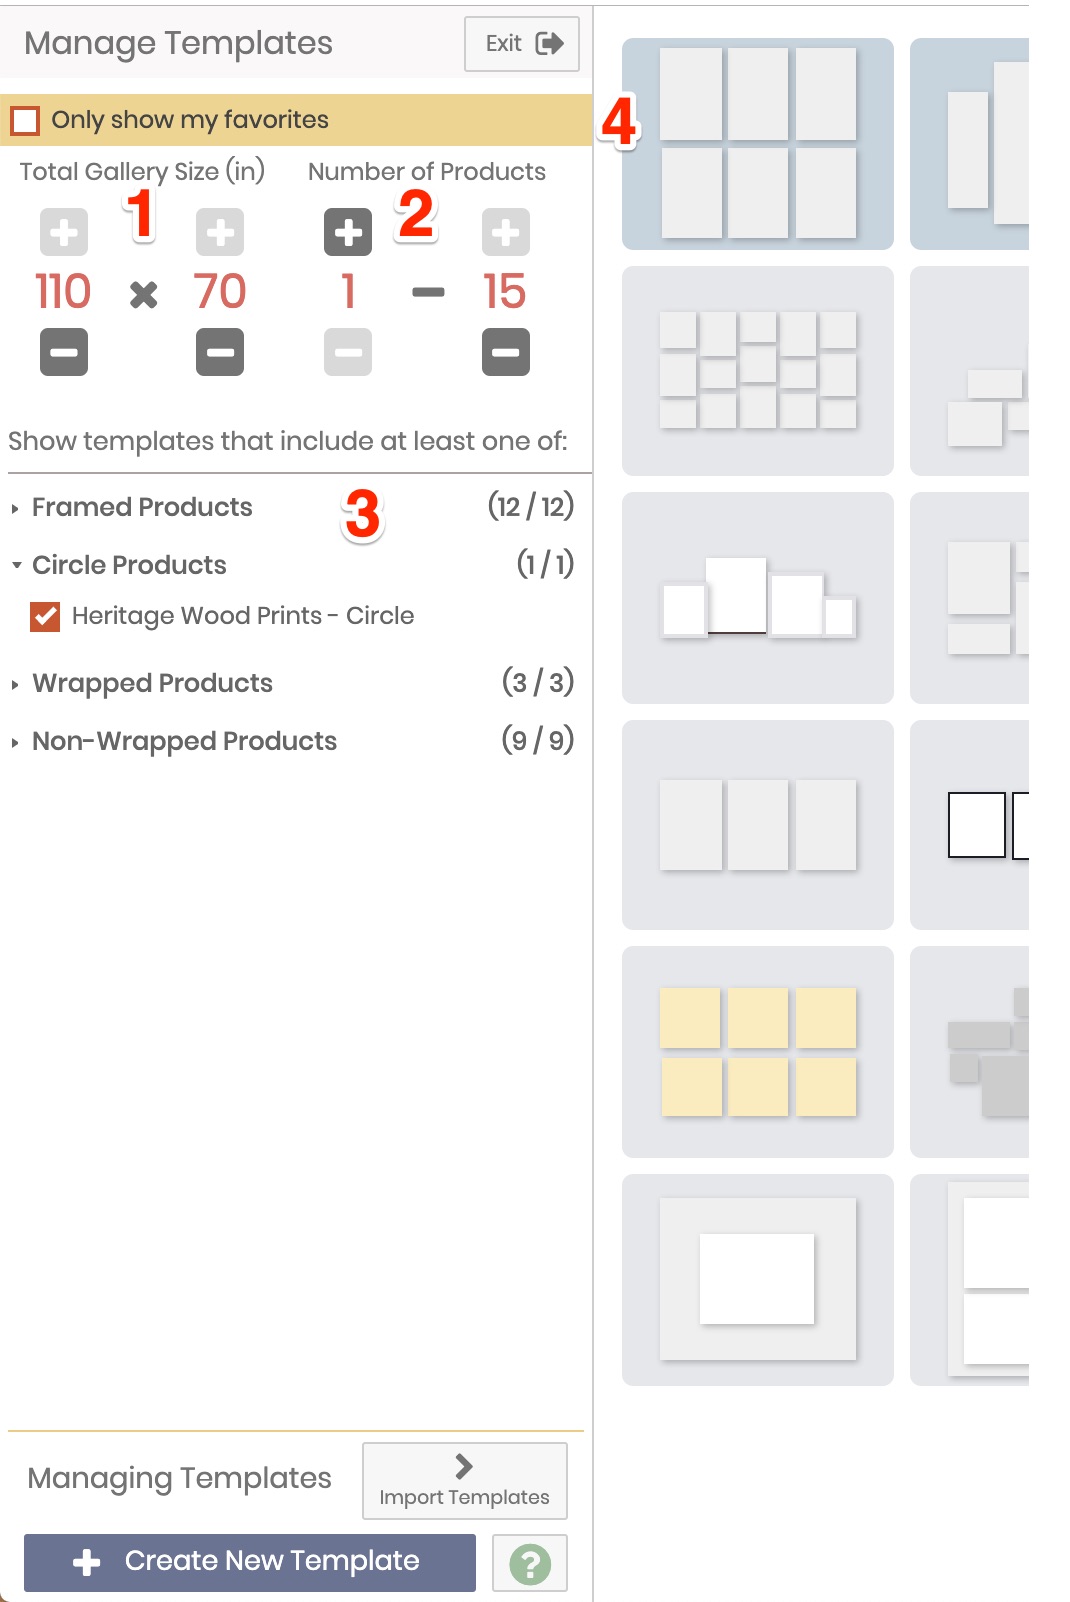
1. Gallery Size
Note: This is pulled from your saved templates so if you have not added templates into your account yet, do that FIRST. We'll use your preferred measurement system to constrain the gallery size. On the left is the width and on the right is the height. Change the dimensions to begin limiting or including the templates that show up.
Swift Galleries calculates this by looping through all of your templates and determines the smallest and largest area that you have available. Using this information, the Designer is limited to the max and min of those areas.
As you add new templates these bounds will change. For example, if your upper limit is 500 and you create a new template with a size of 600, this will be your new bound. Conversely, if you update the template with the upper limit to be 400, your new bound would be 400 (unless there is another template with a size greater than 400 but less than 500).
2. Number of Products
Set a range for the number of products that the template must have to be included.
3. Including Product Types
You may include / exclude various product types. If a template contains at least one of the checked product types, the template will show up. You will need to click the arrow next to the product type category to see all products within each category.
4. Favorites
You may limit the templates you include to only show your favorites. Favorites have a blue background instead of the gray.