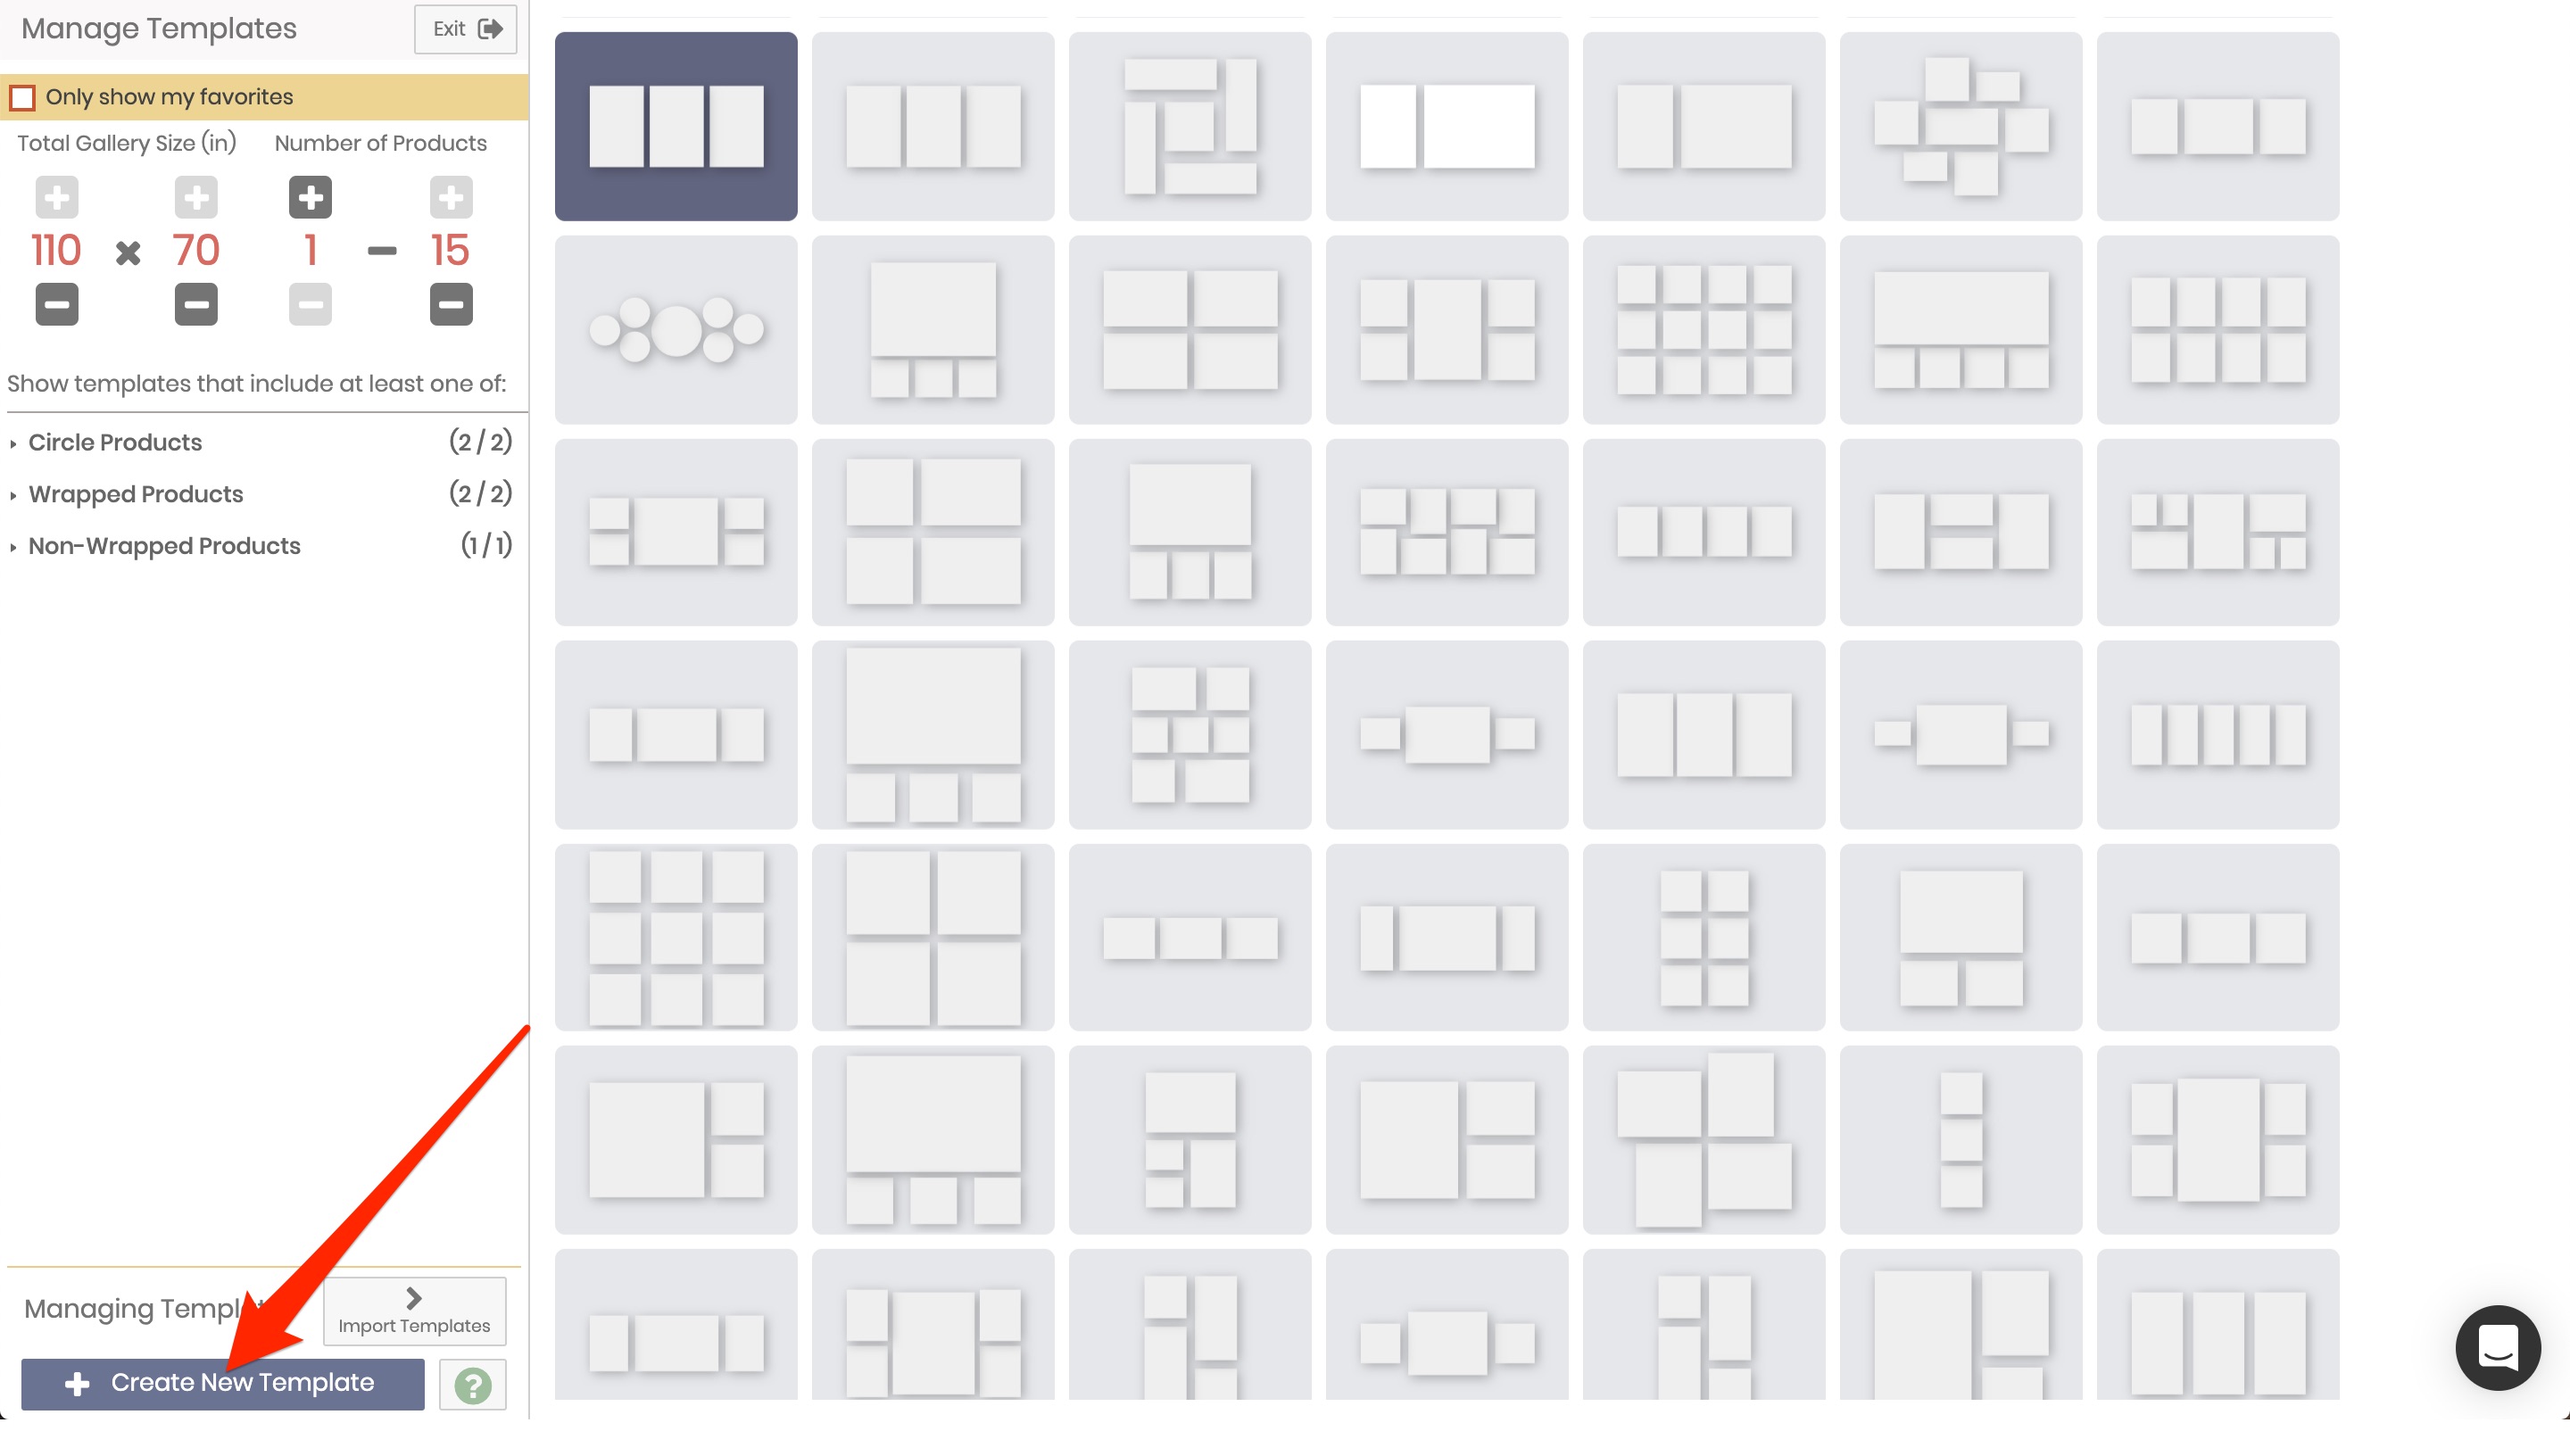
To create a new template, click on "Create New Template" from within the Template Manager. Don't forget, you can import templates that have already been built by clicking "Switch to Import Mode" (seen below).
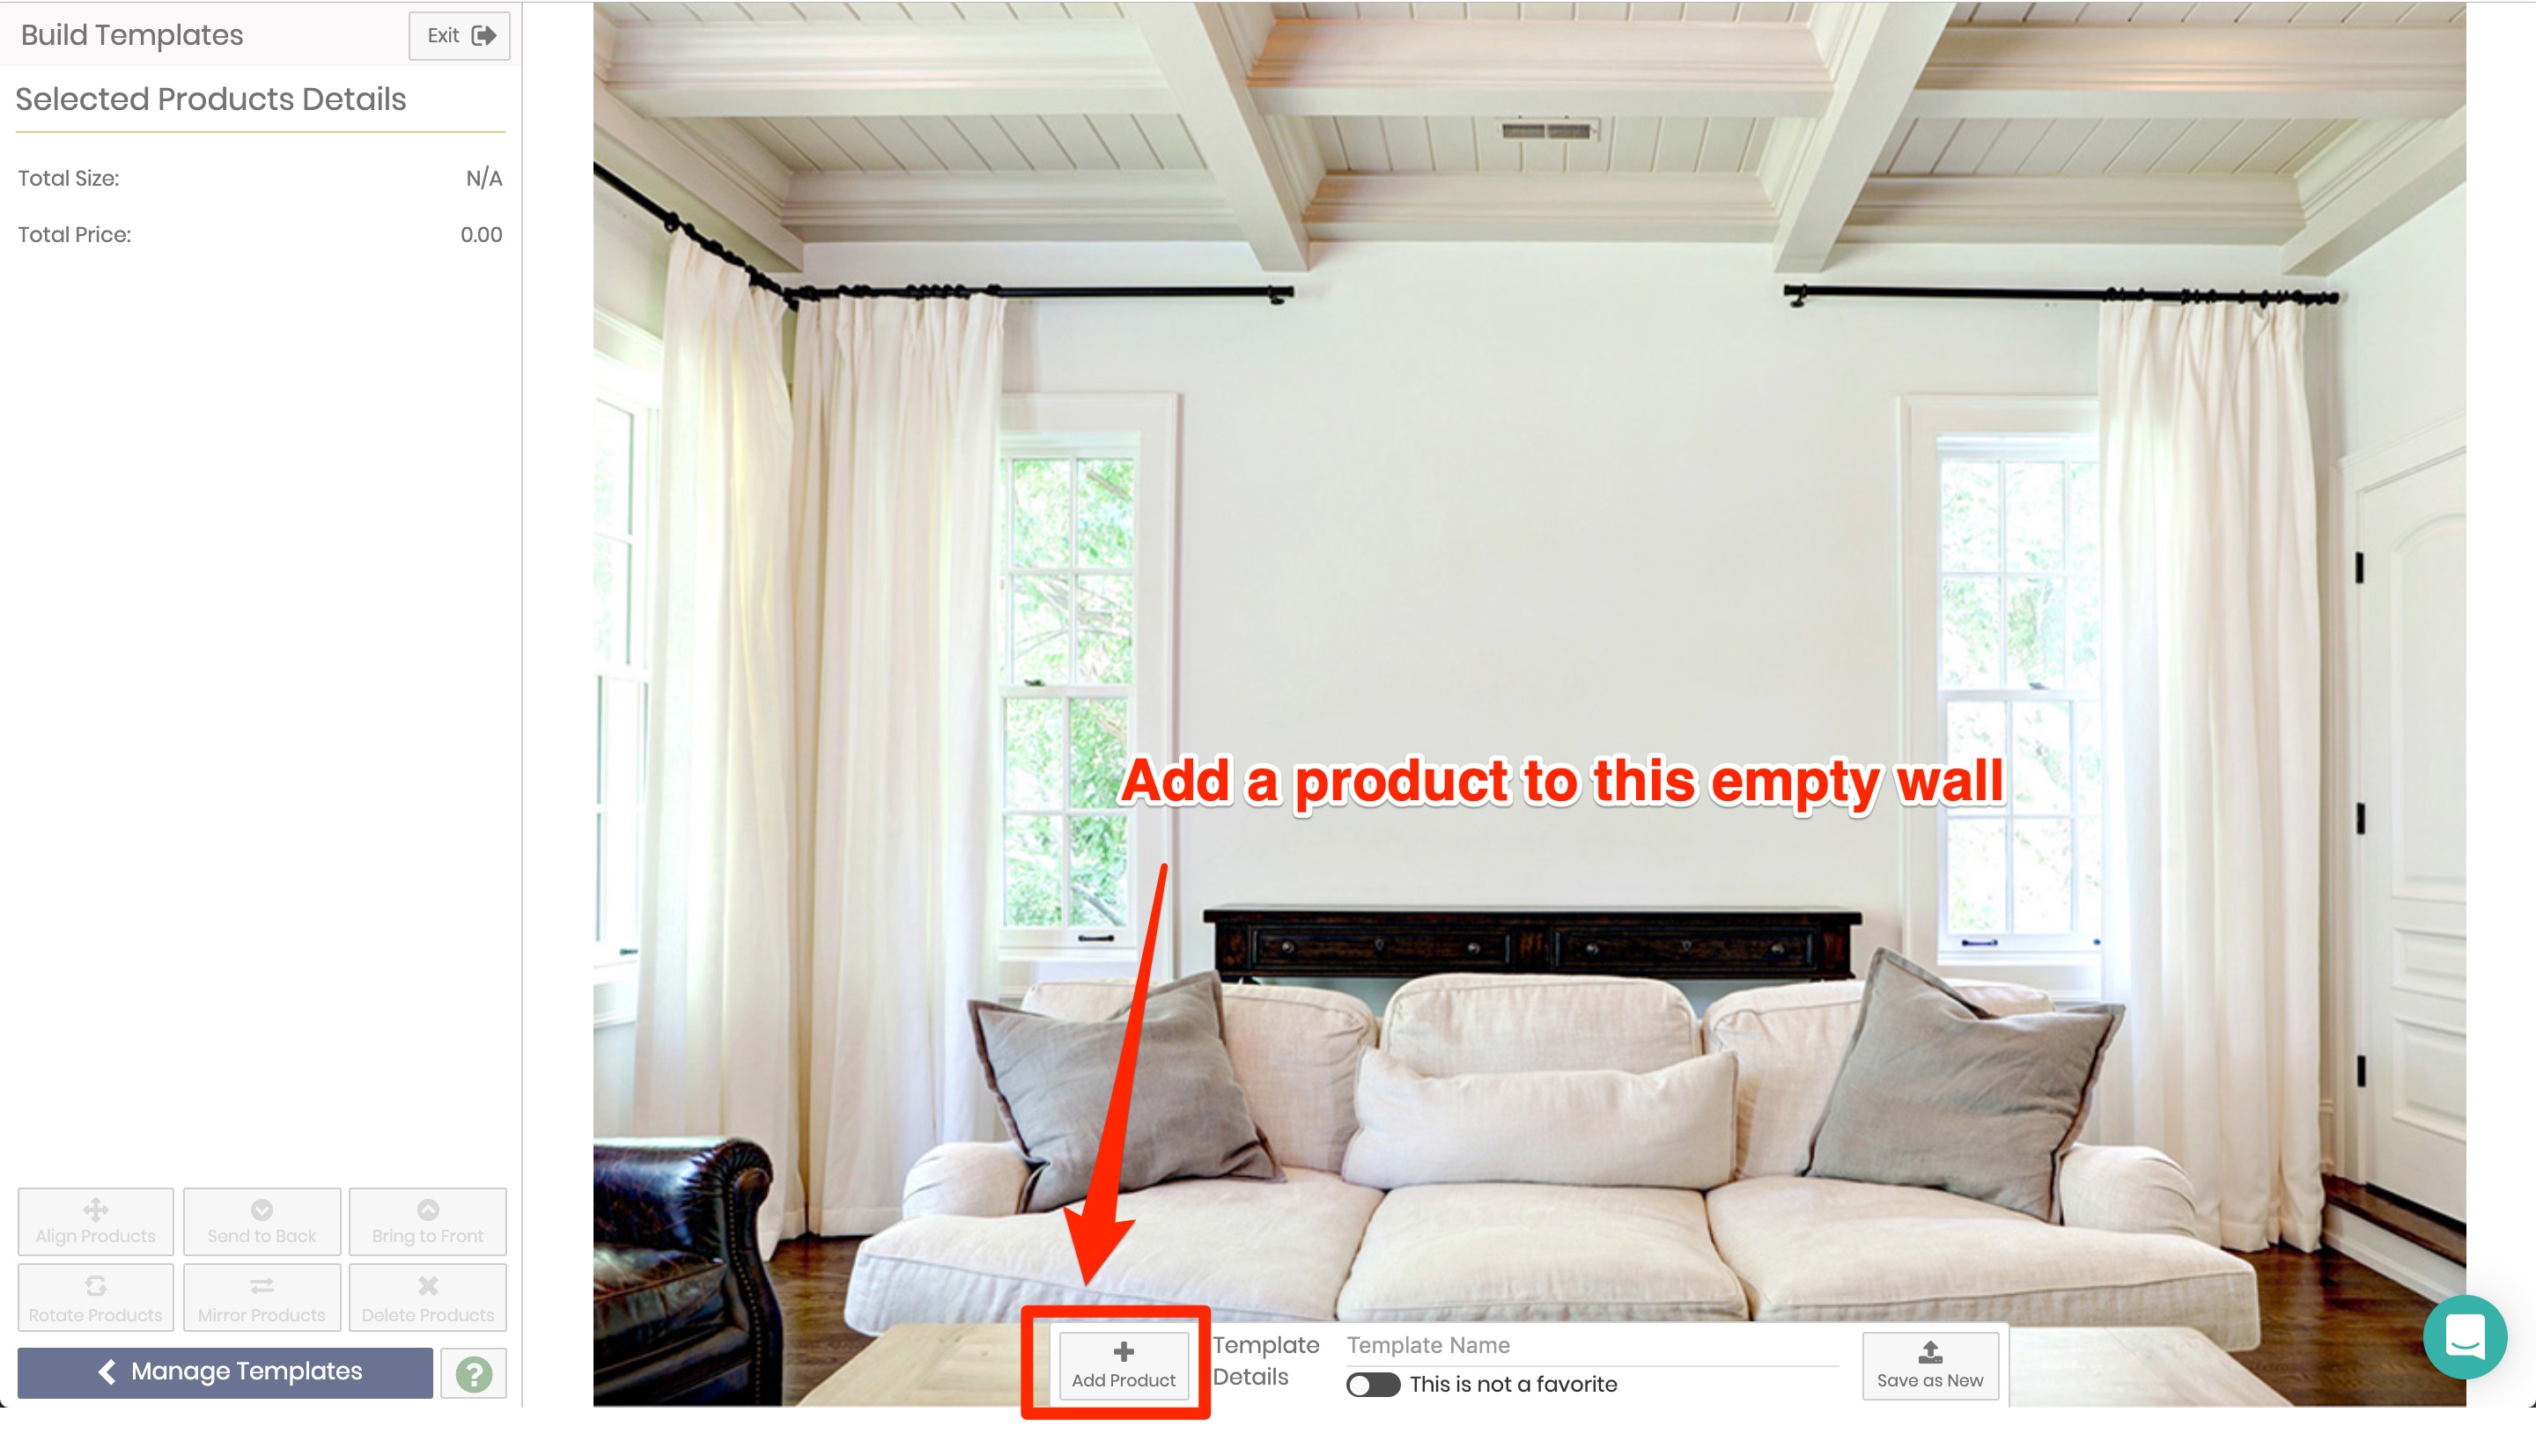
You'll be greeted with a screen that is, essentially, the Designer but modified to support creating templates.
When you first go into Create New Template, you'll see there's nothing on the wall and your buttons on the bottom left are grayed out, since you do not yet have any products to do any of those button-y things with yet. So you'll either click the Add Product button (see below) or click the A key as the keyboard shortcut.
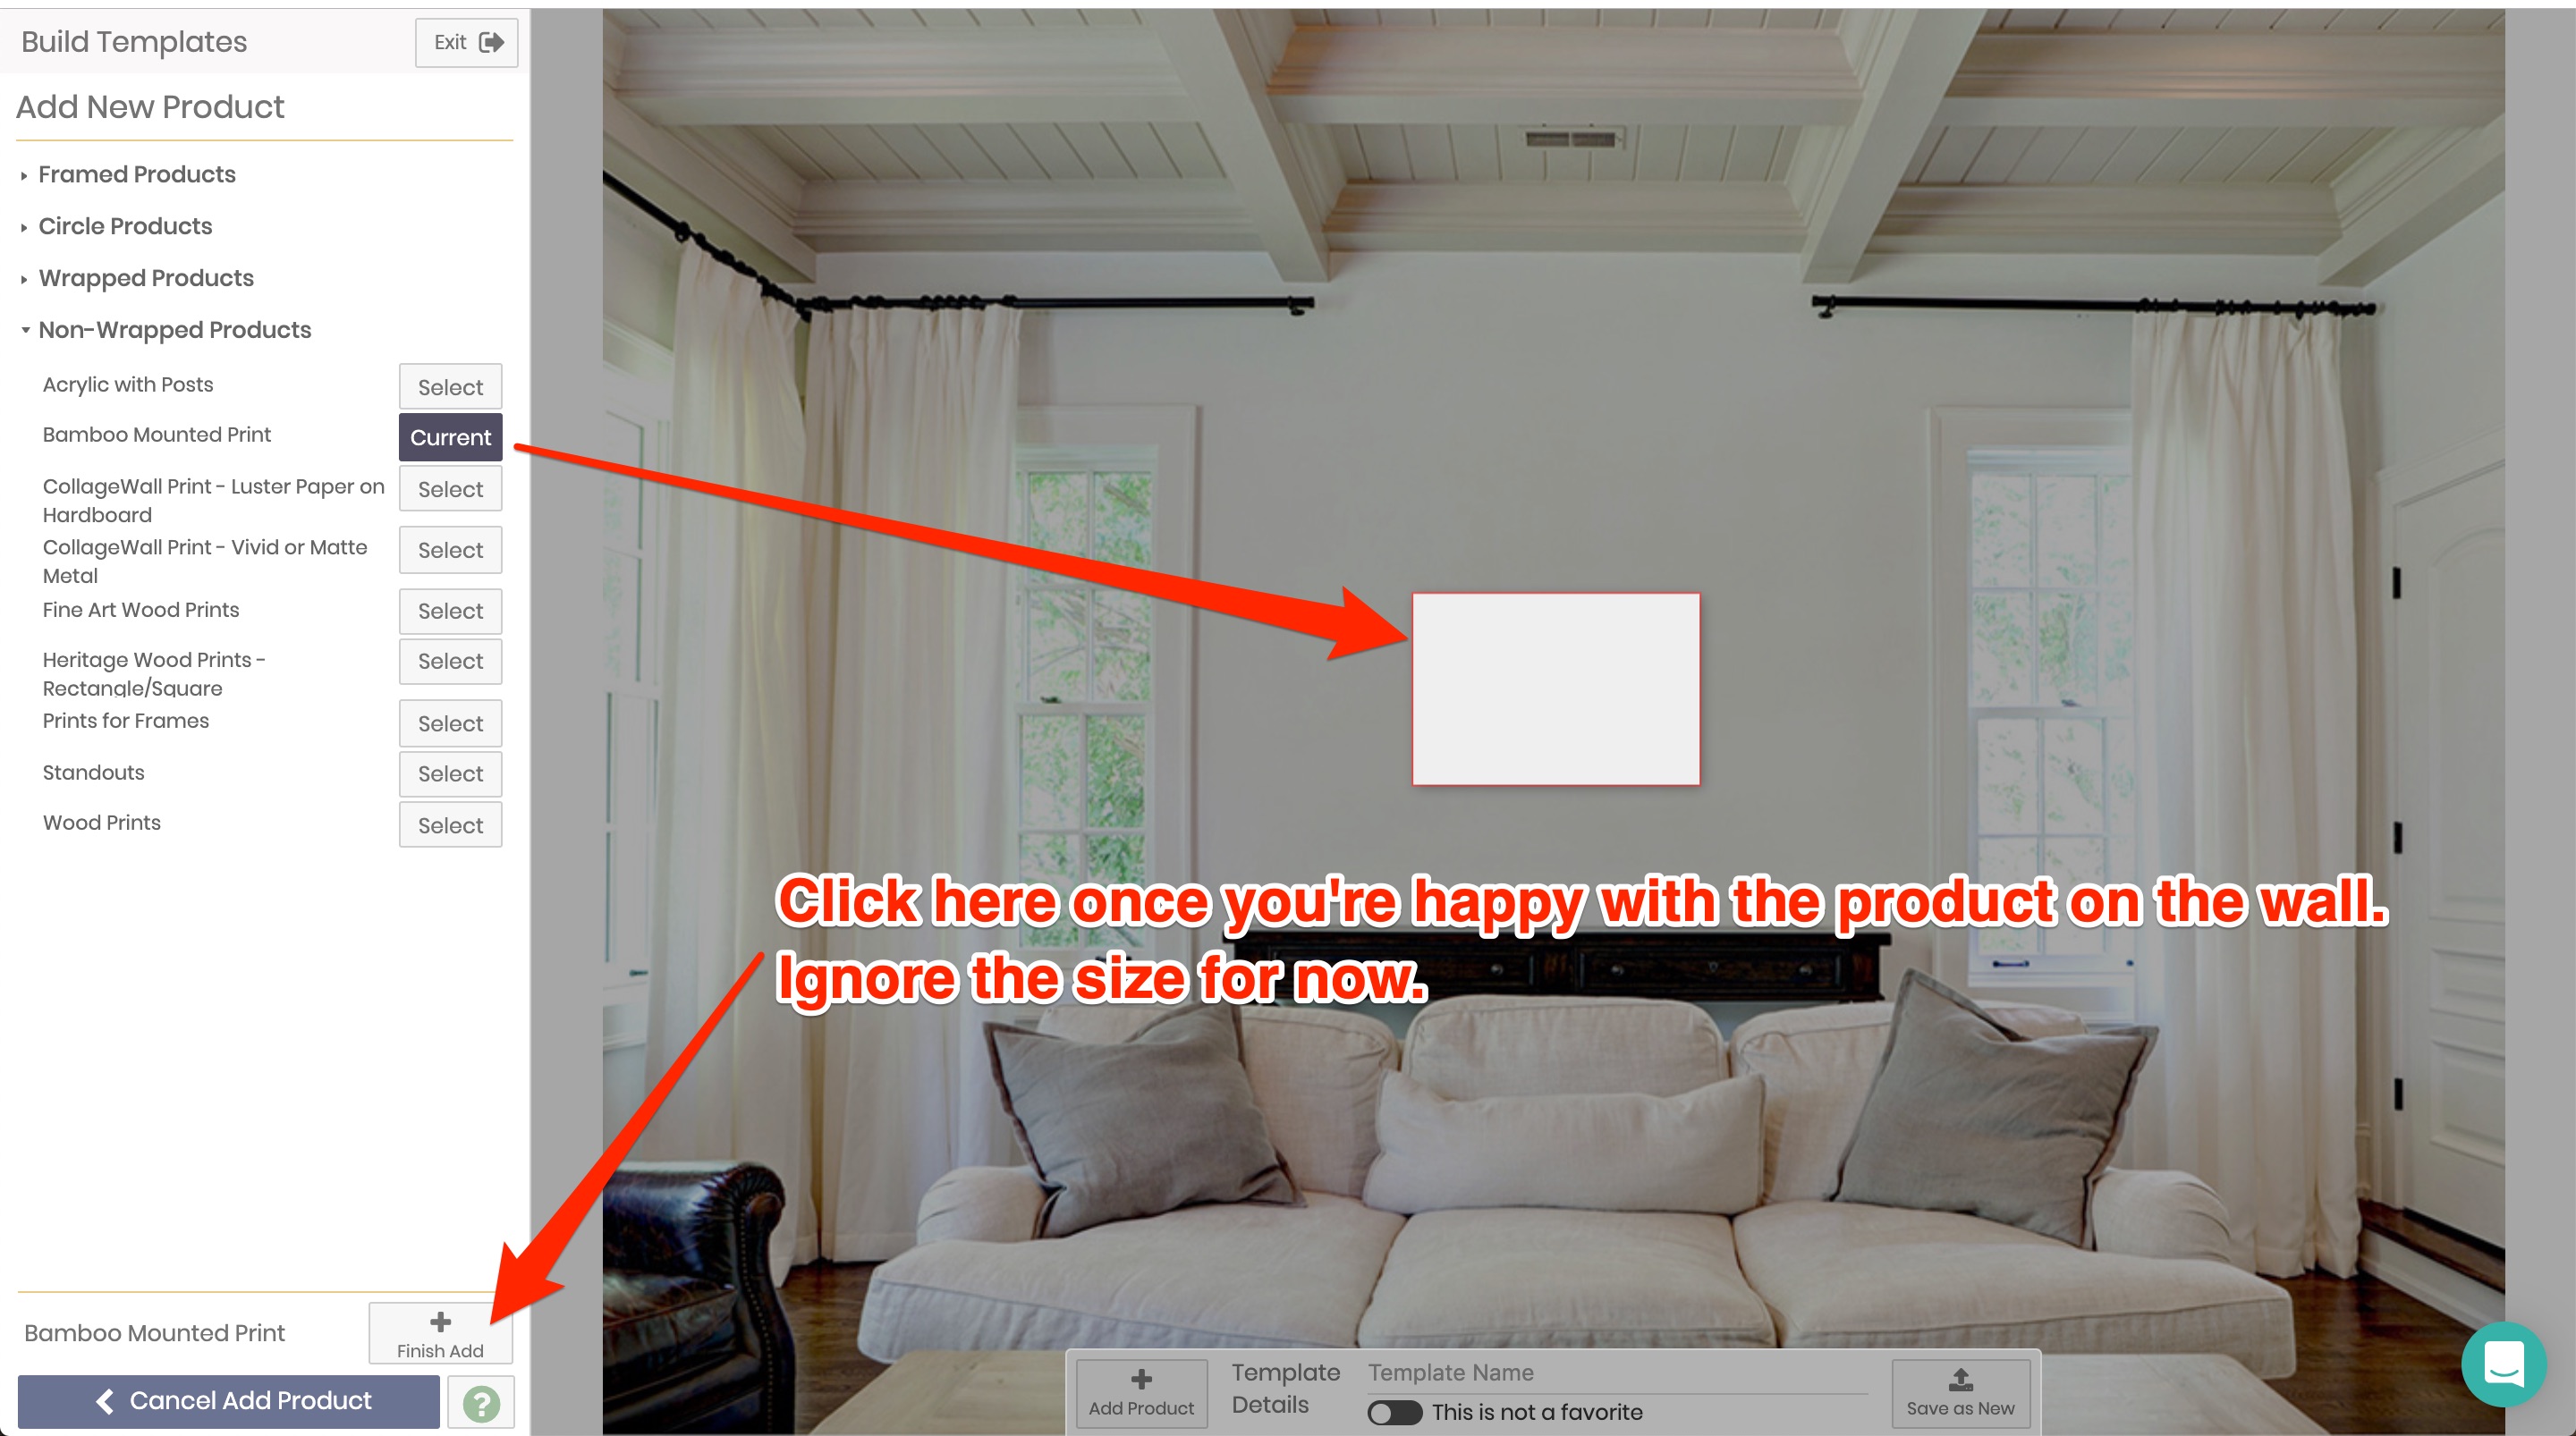
Once you've clicked Add Product, you can expand and collapse your product categories to access all your products. Note that my list shown is based on the products in my own account. Click here if you want to learn how to build or load more products into your account!
Once you've clicked "Select" for the product you want to add to the template, it will look like this and the product will be the largest size you have available in this product. Then click Finish Add when you're happy with the chosen product (ignore the size for now, that's next).
For additional details on how to adding products and gallery level actions (resize, duplicate, rotate, align all that good stuff), please see the Designer documentation:
Working with Products on the Wall
Working with Galleries
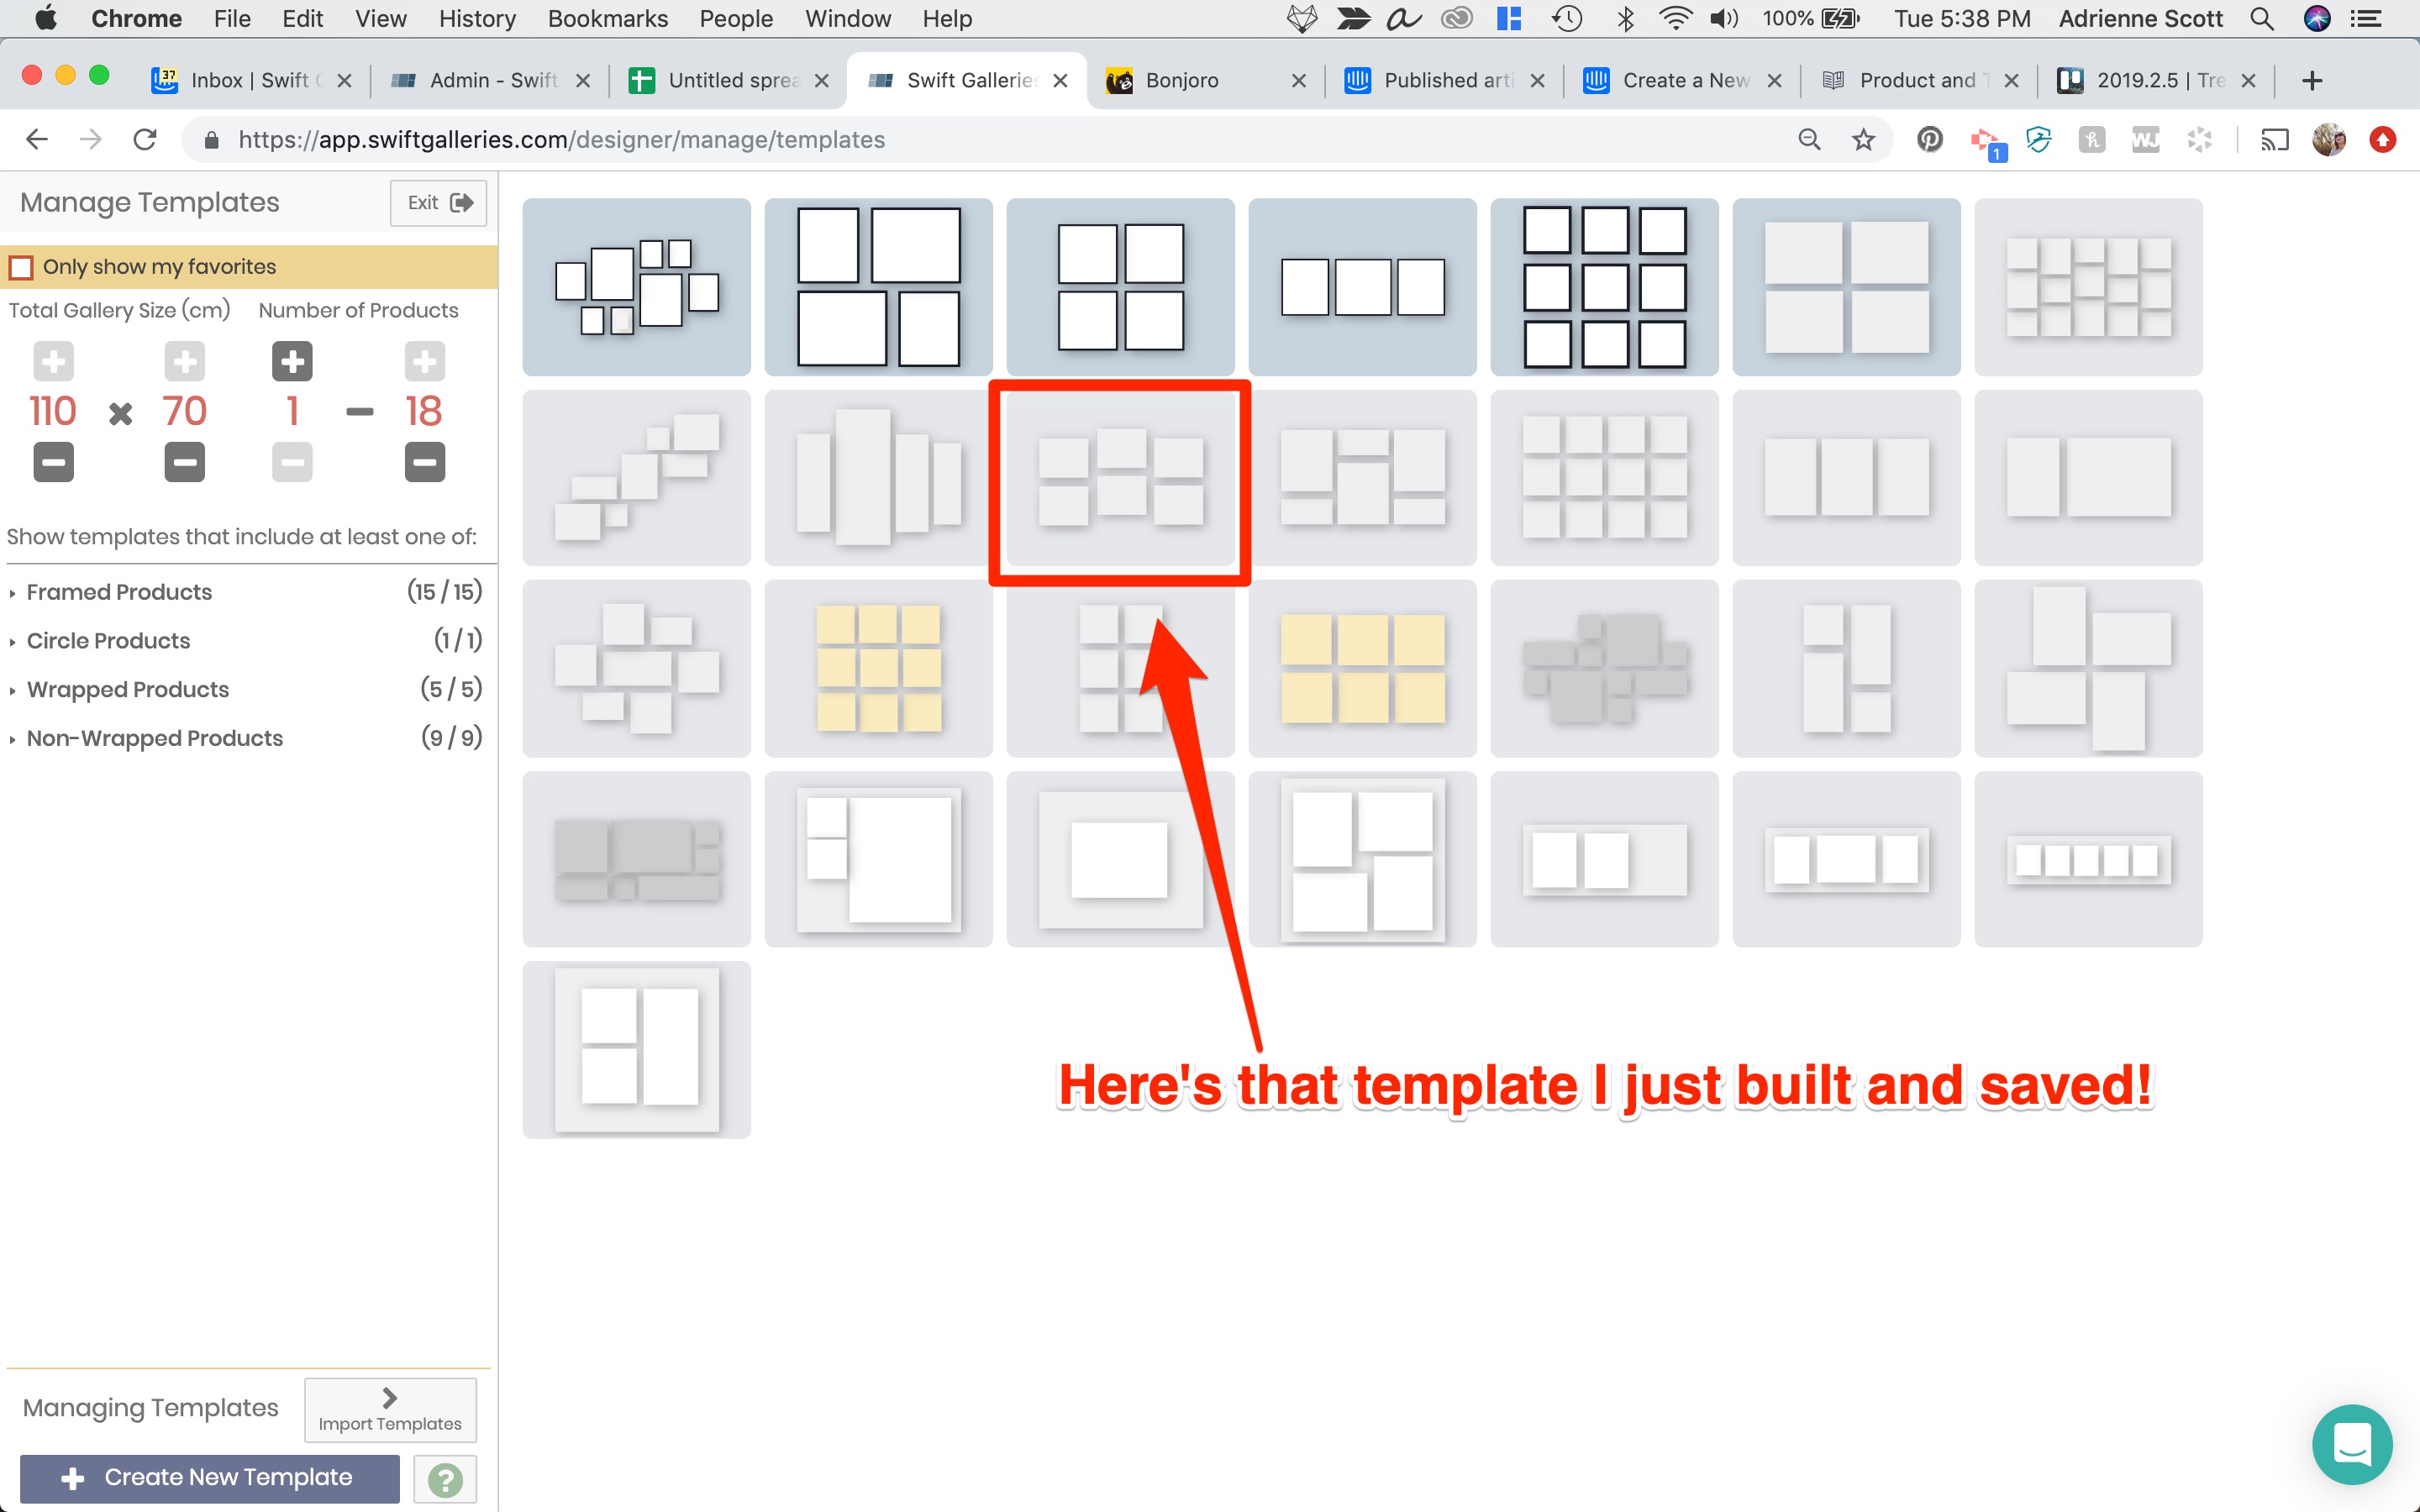
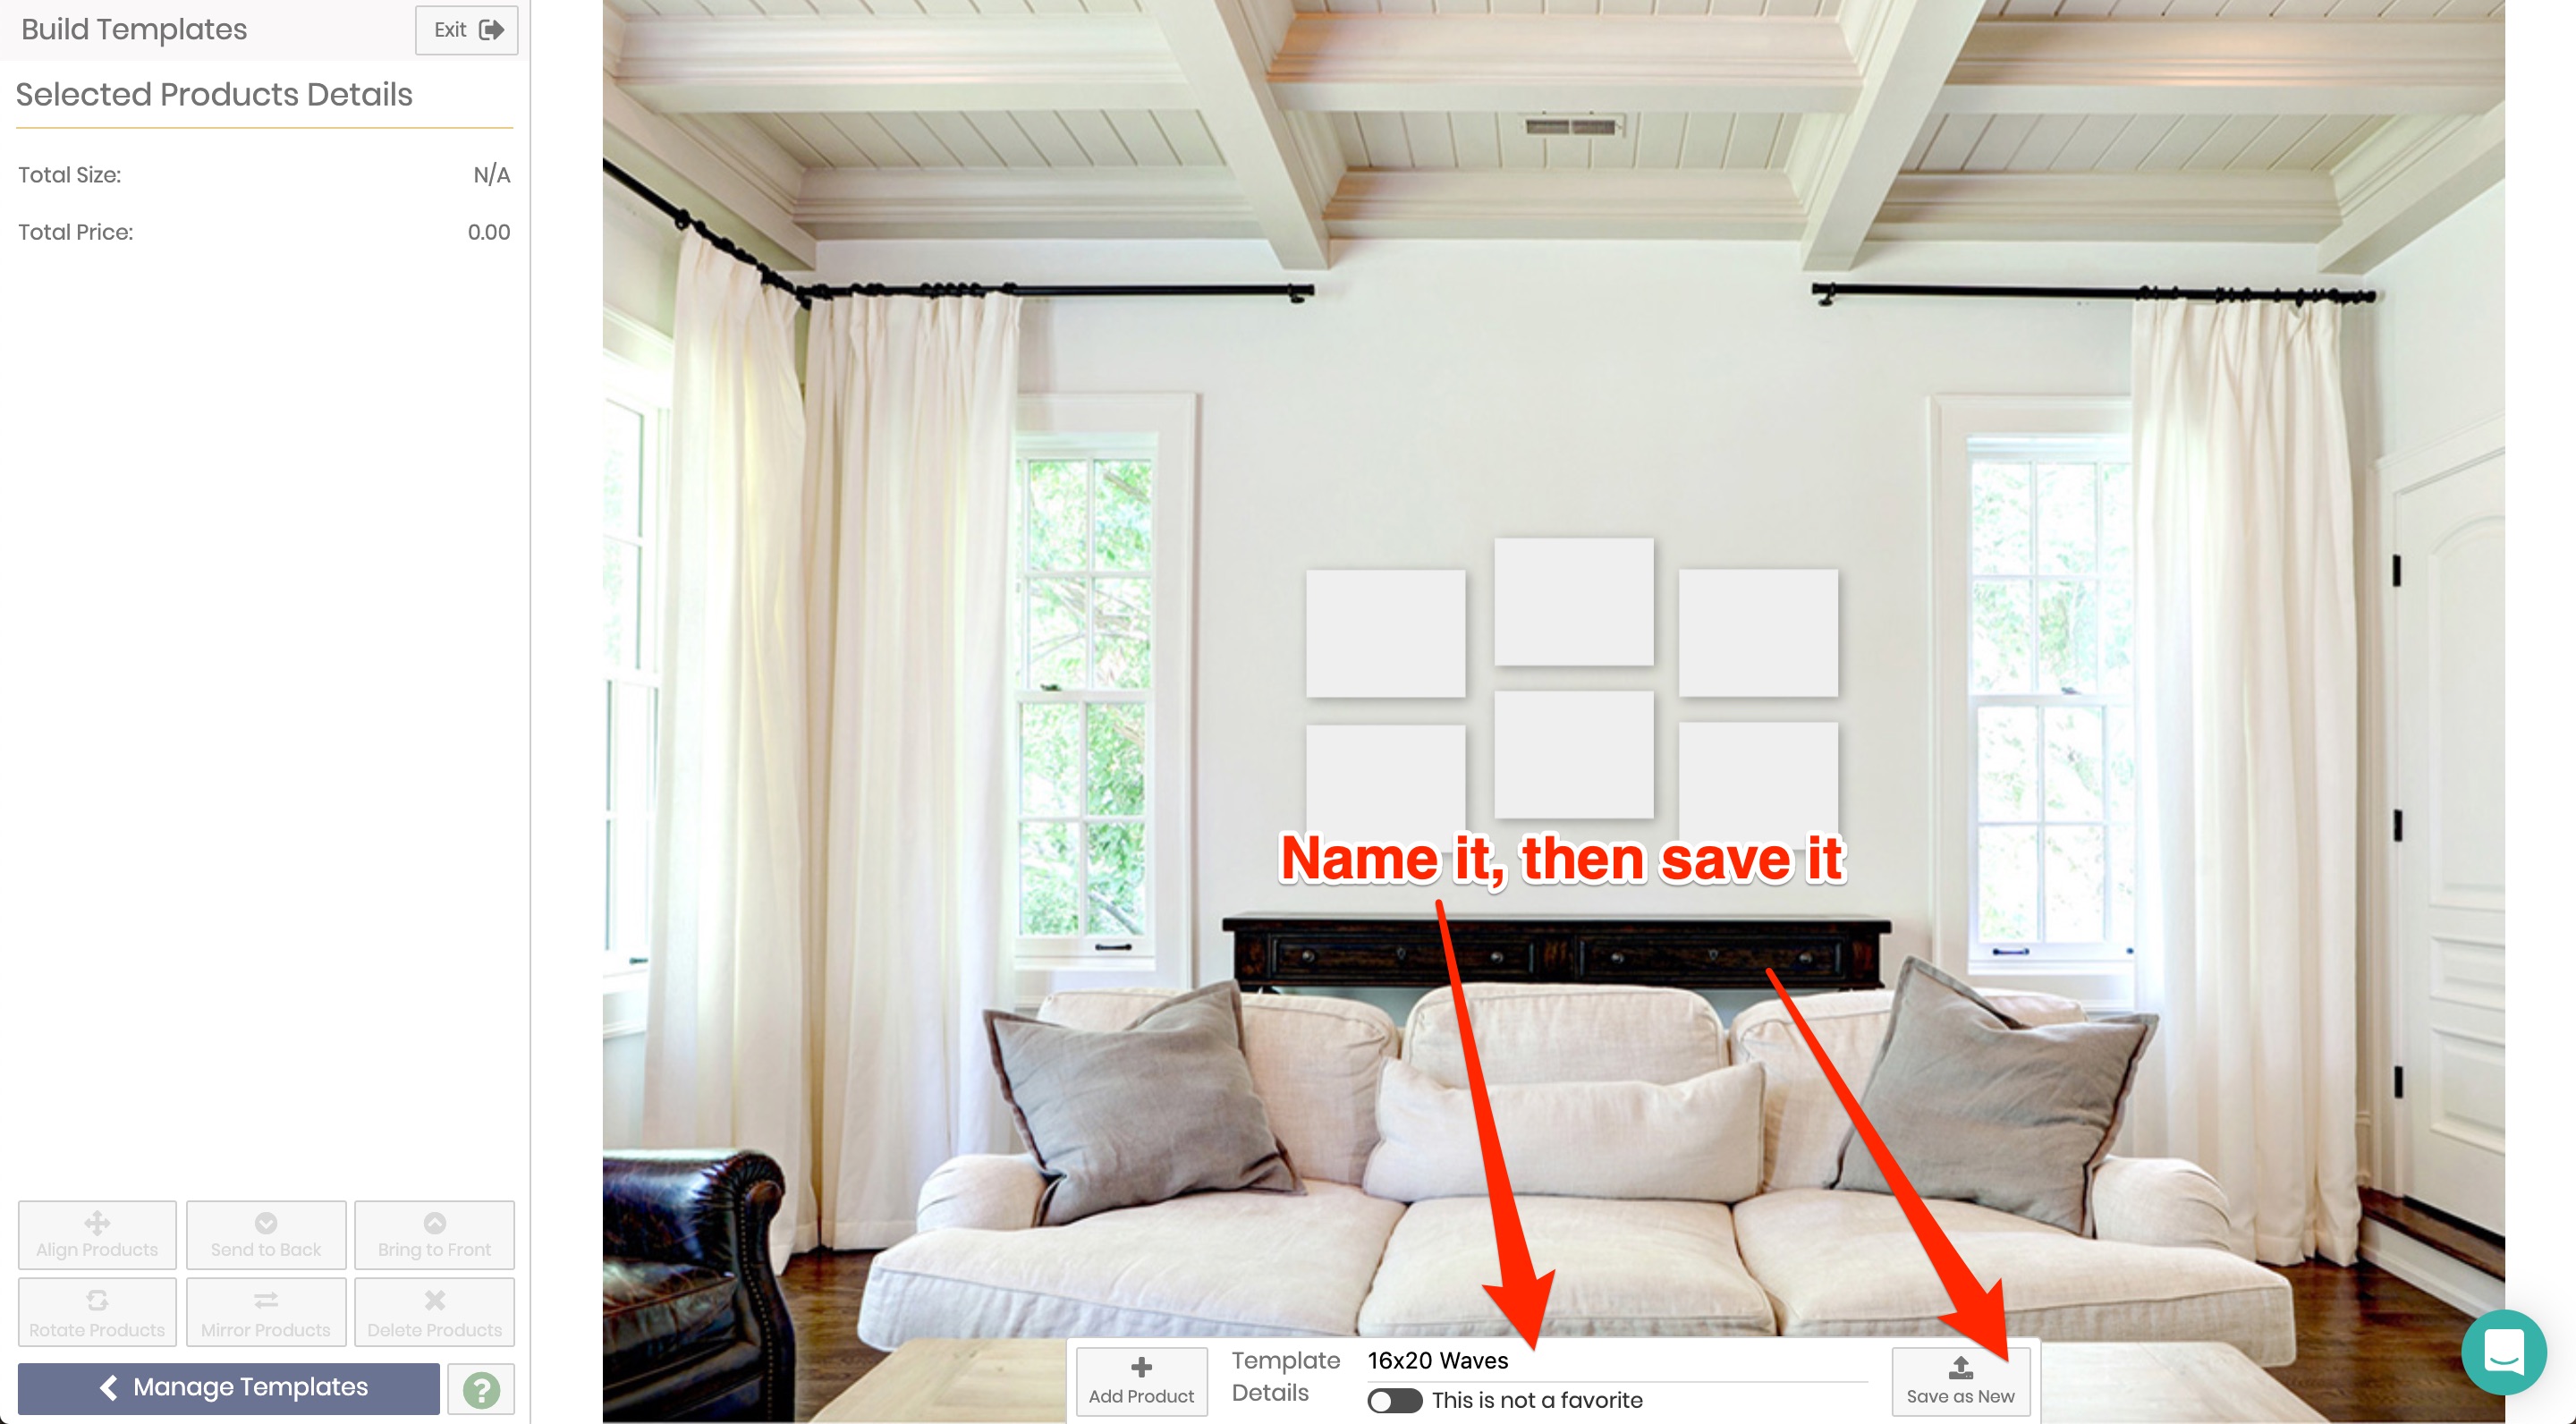
Once you're happy with the design you've created, all you need to do is give it a name and click Save as New:
And you'll be brought back to Manage Templates with that template on the right!