
Ready to show your clients exactly what their photos will look like in your favorite frames? Let's do it!
How you do this will depend on what you already have created or imported into your account.
If you already have the framed product created or imported in your account, follow these instructions:
1. 👉 Download the Frame Edges of your choice from right here. 👈
2. From your Dashboard, go to Products > Manage Products > Click the "Edit" Button for the product you'd like to add a frame edge to.

3. Scroll down to the bottom of the Edit Product screen and click the "Upload a New Border Image" button, then choose your frame image and upload it.

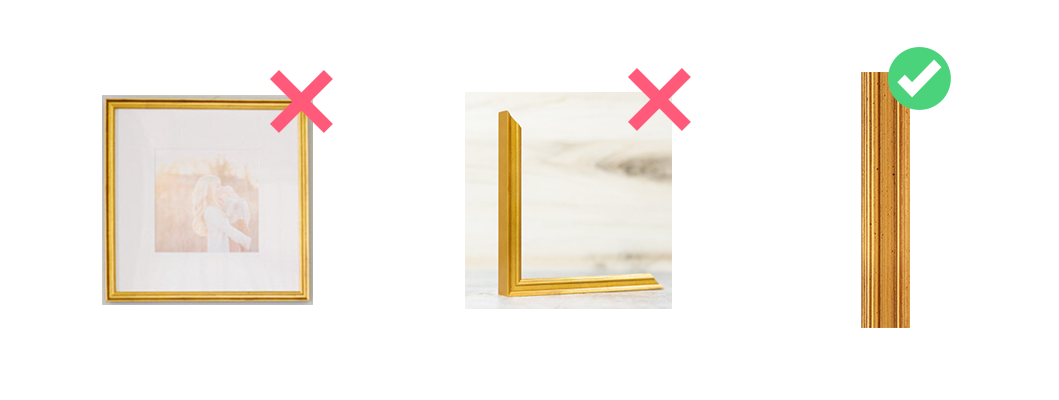
Important: DO NOT upload an entire frame. We ONLY need the right edge of the frame (so the right side will be the outside of the frame and the left side will be the inner edge of the frame.
4. Once your frame edge is uploaded, be sure to enter the width of the frame (in inches or in mm, depending on your lab). This is the actual physical width of the frame, not the width in pixels.
5. Save your product by clicking the Save Product button at the bottom of the screen.
6. That's it! Now when you put that product on the wall in the Designer, it will show with this frame image!
If you haven't yet added or imported the framed product to your account, follow these instructions:
If you're adding a new frame offering to your account by importing it from Swift Galleries then we may have already included the frame image for you!
After importing a product to your account, click the edit button to edit that product, then scroll down to see if there's a frame edge already uploaded for you. If so, you're done! If not, just follow the instructions above.
(Note: We're working hard to get frame images created and uploaded for all of the main labs in the US, UK and AUS. If we don't have frames from your lab, please reach out and let us know which products you'd like added and we'll get to work getting them added for you!)