
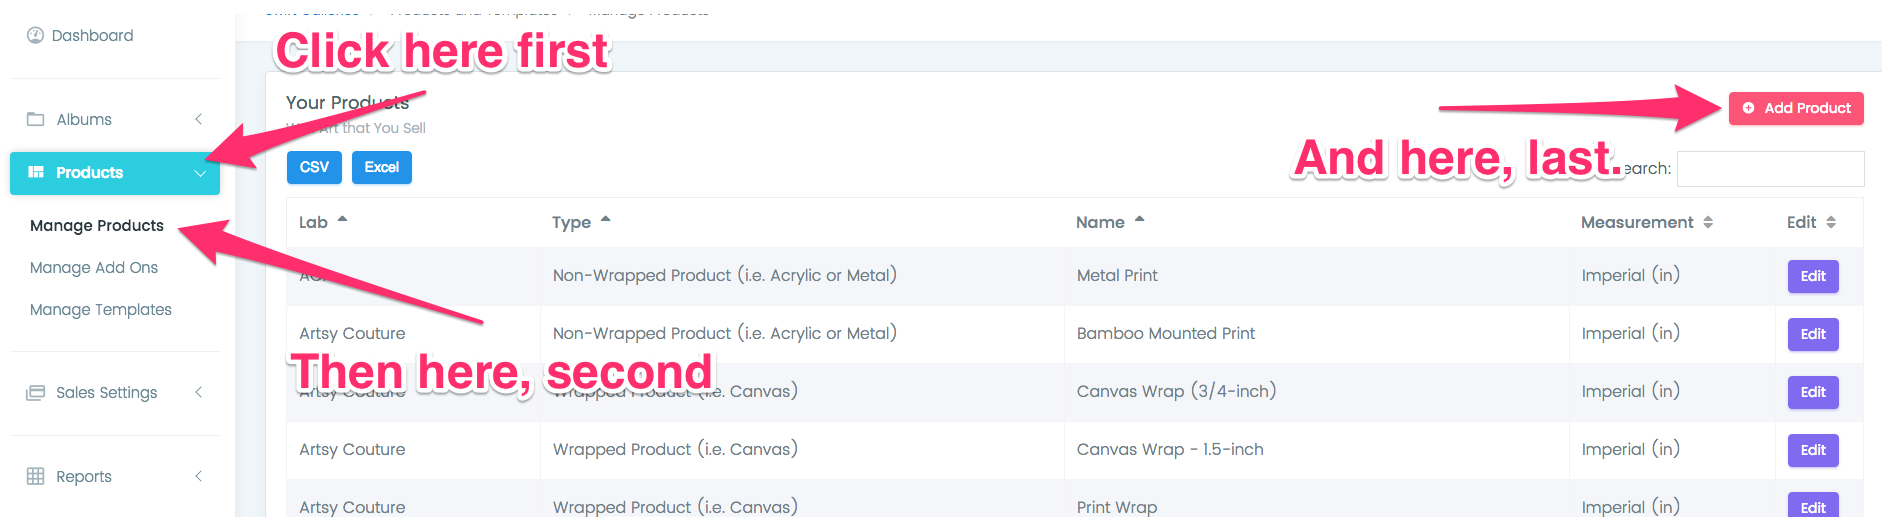
From Manage Products you can choose to Load from Swift Galleries, Import from CSV, or Manually Create when you need to add a new product into Swift Galleries. If this is your first time in Manage Products, you may see preloaded products if you signed up for Swift Galleries using a certain link.
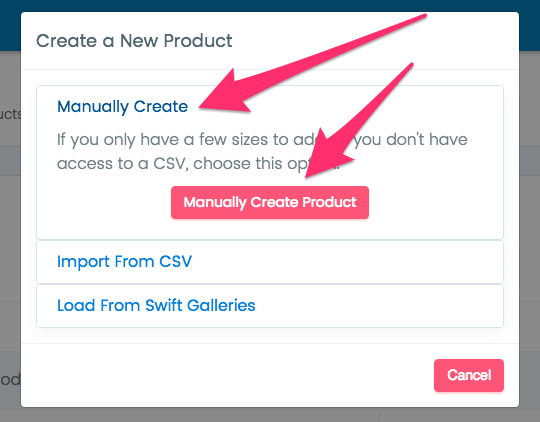
After clicking "Manually Create"...
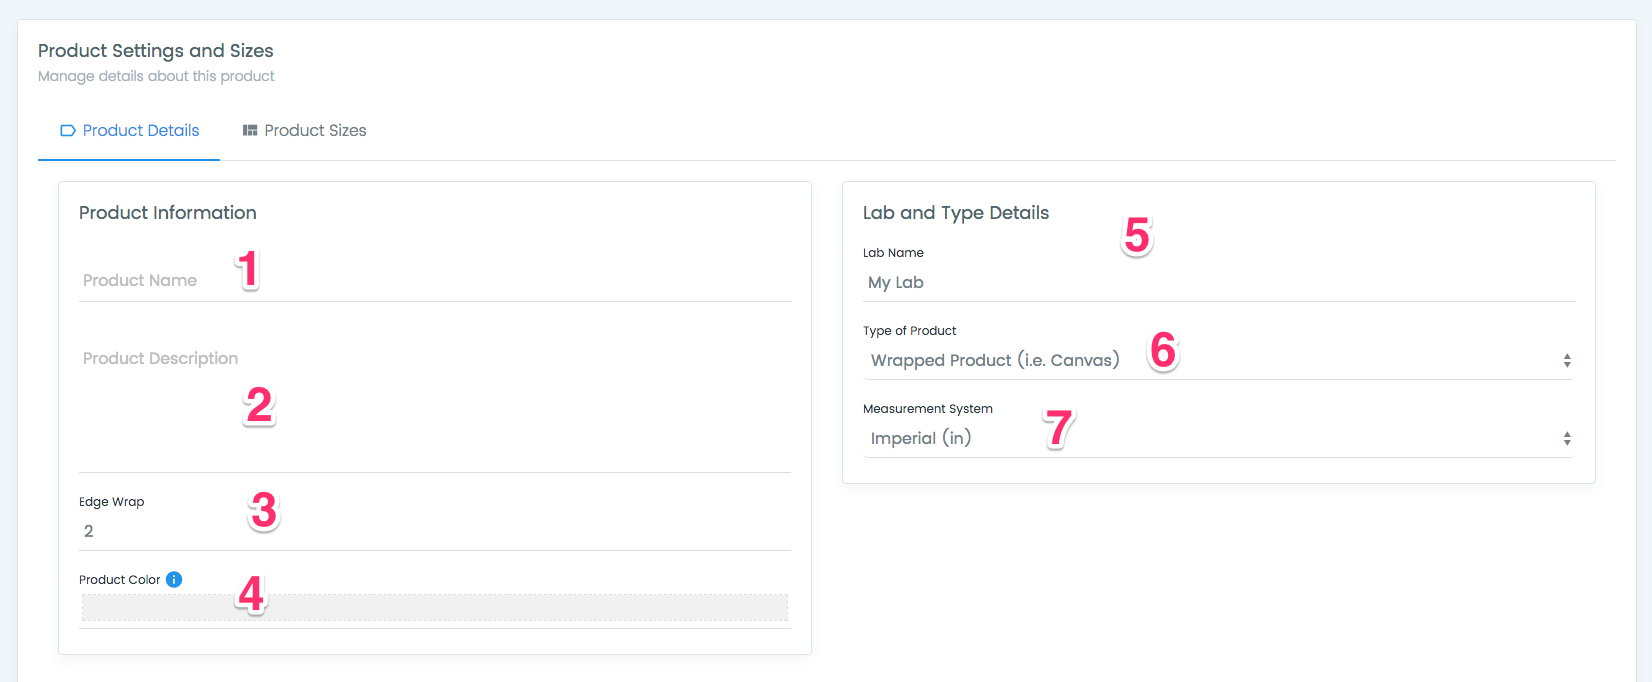
1. Product Name
This name will be visible by clients. If you plan on having more than one option for a product (say, a 3/4" deep canvas and a 1.5" deep canvas) you may want to be a bit more specific.
2. Description
This will be visible by clients when you're editing a product or adding a new product to a room photo. It will not be used in your order form, so you don't need to make sure to include every option you've added (rounded corners, bumpers, etc.) unless you have some products with and some without and this will make choosing the correct product easier.
3. Edge Wrap
Note this is not the same as the depth of a product. So if this is a print wrap or gallery wrapped canvas, for instance, you need to make sure you're showing the correct crop that will include any image that may be wrapped around the back of the product. For example, a 1.5" deep gallery wrapped canvas may have an edge wrap of 2 inches per side.
4. Product Color
The color you choose here will be used anywhere you see empty templates or galleries, to help you know what product you're seeing. If you have more than one framed product and more than one unframed product, you may want to make sure to use different colors.
5. Lab Name
This will not be visible by clients. When going through the entirety of the Swift Galleries cart/checkout system during an in-person sales meeting or online sales opportunity, we do include this onto your filenames, in case you use more than one lab, to make ordering from your lab less confusing for you.
6. Product Type
- Wrapped - Examples include gallery wrapped canvas or print wraps - where you can choose if the image goes around the sides of the product. In the Designer as well as your Studio Preferences you'll be able to choose a preference (white, black, or image wrap).
- Framed Product - You got this one.
- Non-Wrapped Product - These are your prints, metal prints, acrylics, anything that doesn't have the option to wrap the image around the edges.
7. Measurement System
Choose Imperial or Metric.
In the second tab, you'll see the available sizes for this product, including your cost and your price..
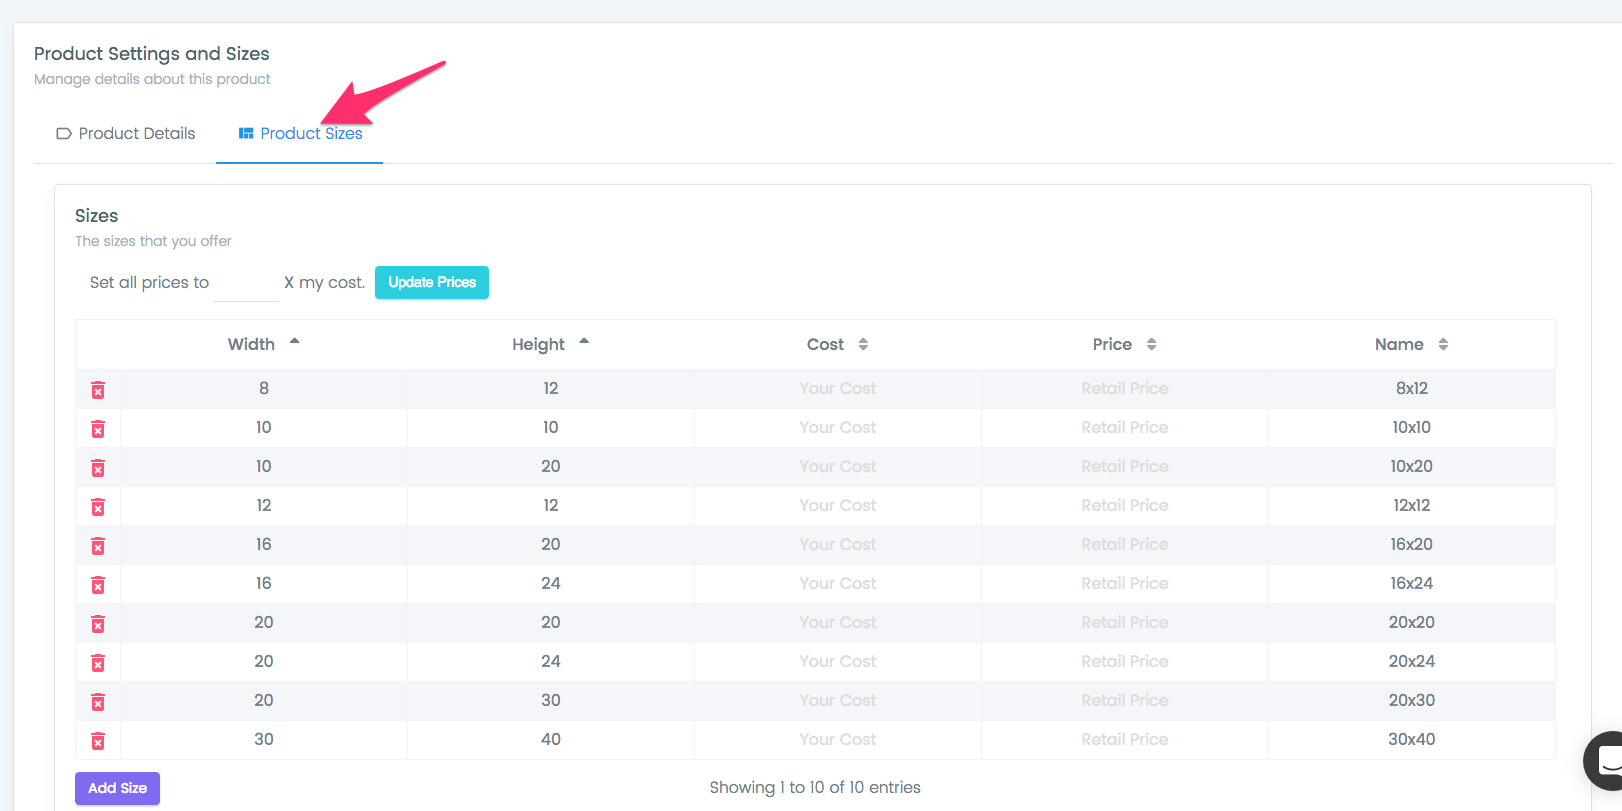
You can delete any sizes you won't be selling, or add any sizes you want to sell but we've left off. Be sure the lab you've chosen for ordering this product offers all the sizes you're including here!
Confirm your lab cost next. Don't forget any options you may have added on, like bumpers or rounded corners.
Next input your price/retail price, which is the price your clients will pay you. If you'd rather take the shortcut, use the "Set all prices to __ x my cost" and choose a multiplier. We suggest starting with 4x cost until you're sure you've chosen profitable prices based on your time, etc.
Click Save Product, and this one's ready to be used! We will create up to 10 templates depending on the sizes you're offering. You'll find them over in Manage Templates as well as the Templates panel in the Designer.